
MerchFoxShop Browser Extension
The MerchFoxShop Browser Extension is a productivity tool that enables merchants to scrape and import products directly from third-party marketplaces — including Amazon, eBay, and Etsy — into their MerchFox.Shop store with a single click. The extension operates directly within your browser, allowing you to browse source marketplaces and selectively import products without manual data entry.
Step 1 — Download & Install the Extension
Download the latest version of the MerchFoxShop Browser Extension from the following link:
https://default.merchfox.shop/download-addon
Once downloaded, follow the installation steps below:
Extract the downloaded ZIP archive to a folder on your local machine
Open your Chrome browser and navigate to chrome://extensions/
Enable Developer Mode by toggling the switch in the top-right corner of the Extensions page
Click Load unpacked and select the extracted extension folder
The MerchFoxShop extension icon will appear in your browser toolbar, confirming a successful installation
ℹ️ The MerchFoxShop Browser Extension is currently supported on Chromium-based browsers, including Google Chrome and Microsoft Edge.
Step 2 — Connect the Extension to Your MerchFoxShop Account
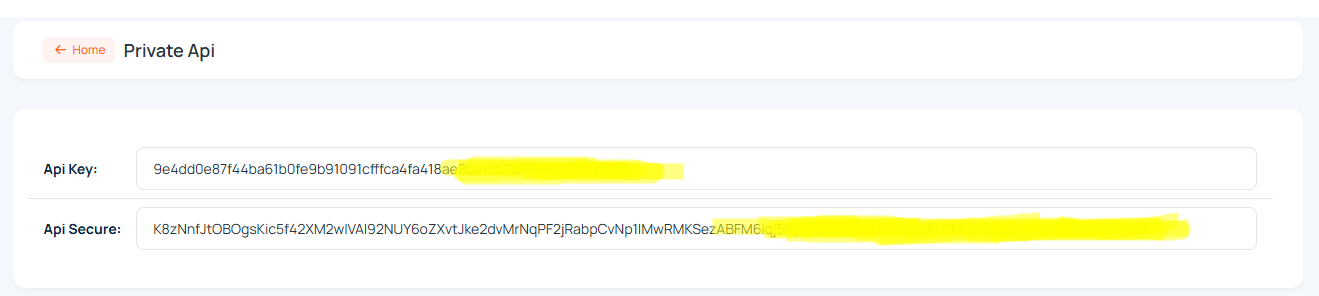
The extension authenticates with your MerchFox.Shop store via your Private API credentials. To retrieve your API credentials, navigate to Apps → Private API in your MerchFox.Shop dashboard. Your API Key and API Secret are displayed on this page.
Once you have your credentials, open the MerchFoxShop extension by clicking its icon in the browser toolbar and complete the following fields:
Token Key — Enter the API Key from your Apps → Private API page
Secret Key — Enter the API Secret from your Apps → Private API page
Click Save Token to authenticate and link the extension to your store. A confirmation message will indicate that the connection has been established successfully.
Step 3 — Configure Import Settings
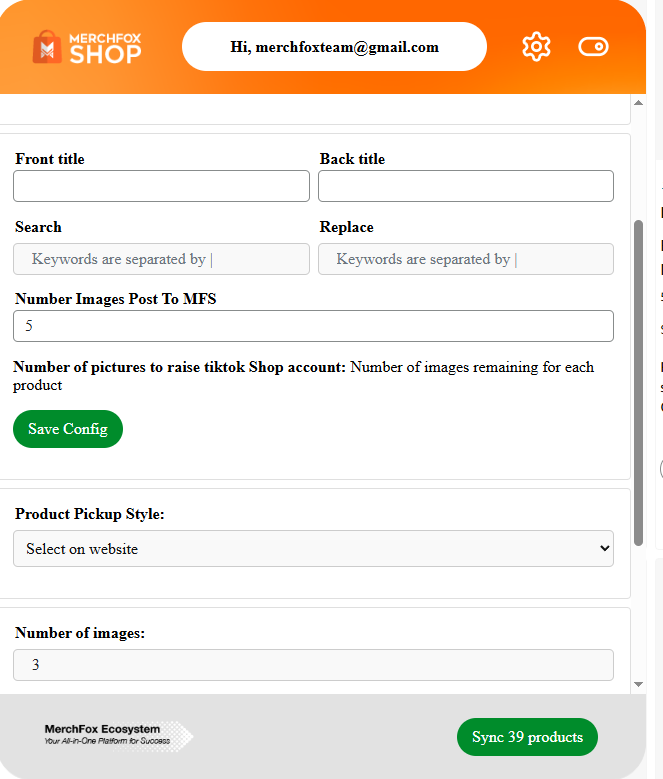
Before syncing products, configure the extension's import behavior using the following settings:
Product Template — Select the pre-configured Product Template to apply to all imported products. The selected template will automatically populate each imported product with the corresponding description, size chart, collections, TikTok Shop category, variants, and pricing rules
Number of Images — Specify how many product images to import per listing
Time Processing — Set the delay interval (in seconds) between each product import to avoid rate limiting on source marketplaces
Front Title / Back Title — Optionally prepend or append text to the imported product titles
Search / Replace — Define keyword substitution rules to find and replace specific terms within imported product titles automatically
Number of Images Post to MFS — Define how many images per product should be pushed to your MerchFox.Shop store during the sync process
Click Save Config to apply your settings.
Step 4 — Scrape & Sync Products
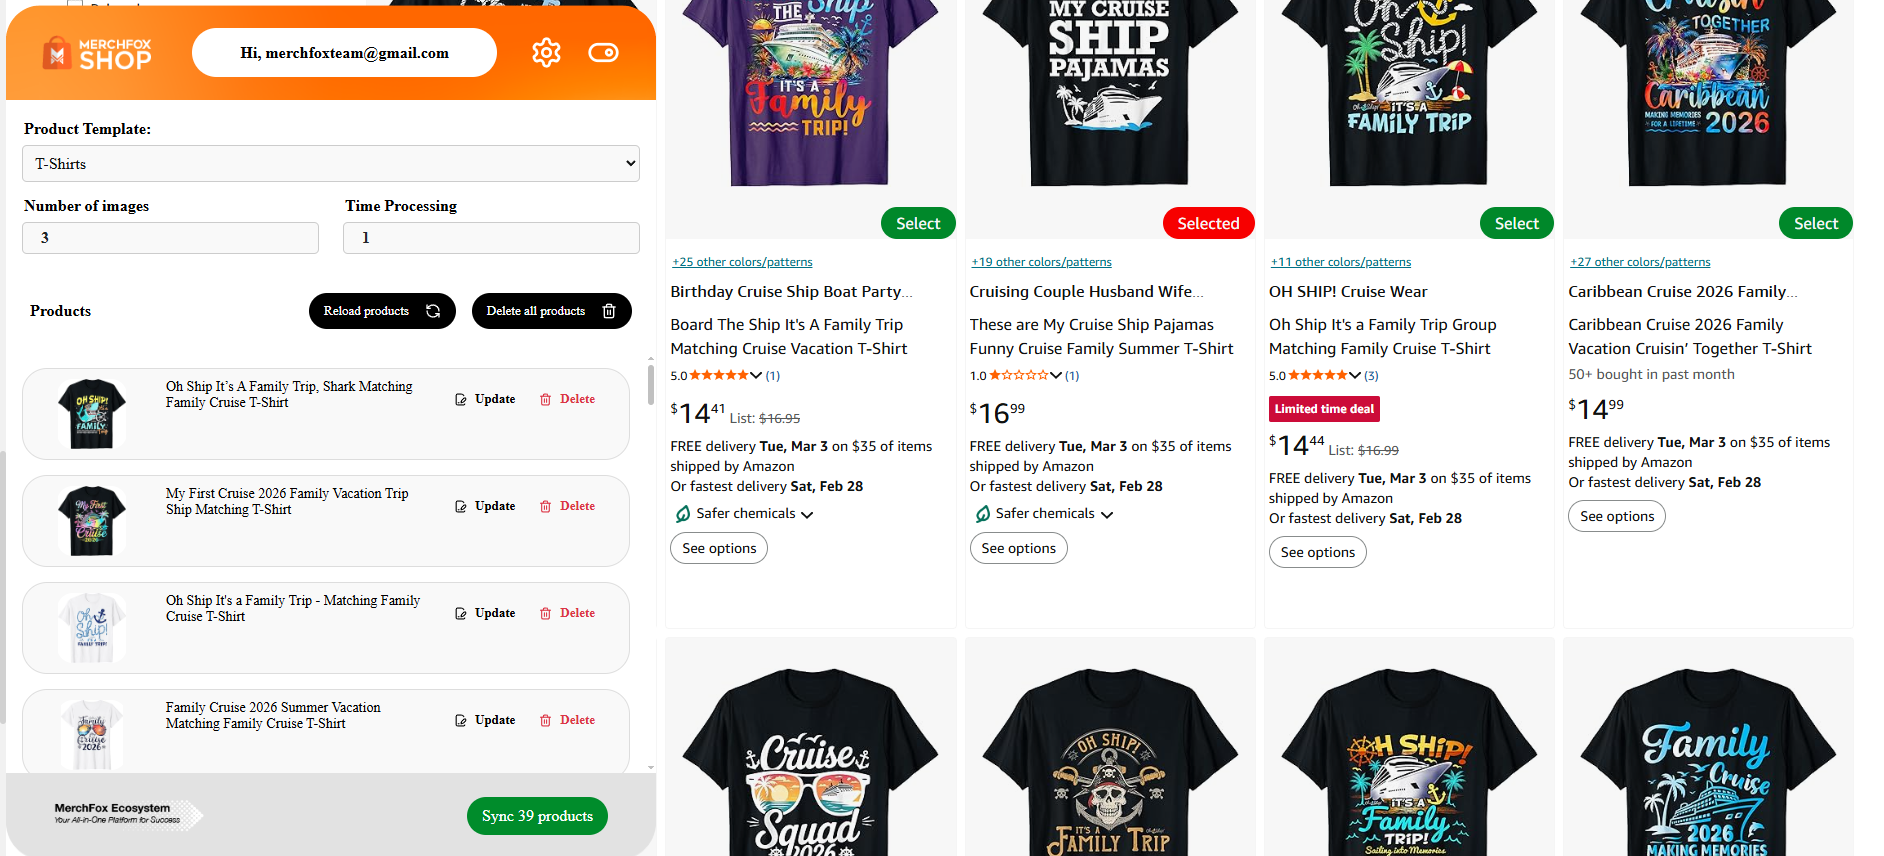
Navigate to any supported marketplace in your browser — Amazon, eBay, or Etsy — and browse or search for products you wish to import. On the product listing page, the MerchFoxShop extension panel will display detected products alongside a Select button for each item.
Click Select on any product you wish to import. Selected products will be highlighted and added to your import queue in the extension panel
The left panel of the extension will display a running list of all queued products, each with an Update or Delete option for queue management
Once your selection is complete, click Sync [n] products at the bottom of the extension panel to initiate the import
The extension will automatically process each queued product and push them to your MerchFox.Shop store, applying the configured Product Template and import settings to each listing.
⚠️ Ensure that you are logged into your MerchFox.Shop account in the same browser session before initiating a sync. The extension uses your active session in conjunction with your API credentials to authenticate each import request.
Was this article helpful?
Let us know so we can improve our documentation.
Still need help? Contact our support team →